A little bit of Fall in my Makeup…

We are almost in fall (like in only 2 days, summer will be ended), so i thought making a fall makeup fitted the occasion…

I love this makeup, it’s warm, colorful but still easy to wear in your everyday life because it’s not too dramatic… And it match really well my haircolor, so ginger girls, you need to try this one!!!

Let’s get started!

Step 1: Foundation

Use your favorite foundation, for me it’s the Jasmin Water BB Cream from BRTC as usual, and apply it all over your face. Then, blend it on with a brush or your finger.

Step 2: Concealer

Apply your concealer on dark circle and other imperfection you can have. With a brush or even your fingers, blend it carefully. I used Touche Magique from L’Oréal as usual, but you know what? I finish this concealer while a was making this tutorial… So i need to get a new one now! (Yeah, i always wait to finish one product BEFORE buying a new one)

Step 3: Blush

Now, SMILE! And apply your blush on the puffed part of your cheek! I used sasatinnie cream blush, that’s why i use my fingers to apply it and a brush to blend it.

Oh, i used the shade Coral Pink.

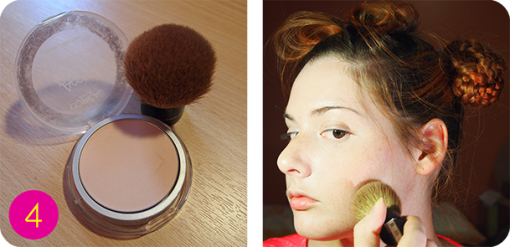
Step 4: Powder

Your face is almost done, you just need now to set it with your favorite powder: i  used  Accord Parfait powder from L’oréal in the shade Rose Ivoiry.

Step 5 to 11: Eye Makeup

First step of everything, prime your eye will a eyeshadow primer. Aplly it all over your eyelid un under your waterline too. Do i really need to mention that i used the Urban decay Primer Potion?

Use a cream eyeshadow (i prefer using cream eyeshadow as a color base) or a Jumbo pencil in a copper shade, and apply it all over your eyelid. I used Frontcover cream eyeshadow in the shade…. Copper! ^^

Next, choose a matte camel/light brown eyeshadow color and apply it on the outer corner and the inner corner of your eyelid. Leave the center with the copper color only. I used the shade “Groucho” from Frontcover.

To highlight the makeup, use a cream goldy shimmery color on the middle of your eyelid. I used the cream eyeshadow front Frontcover in the shade “cream”. (again, ^^)

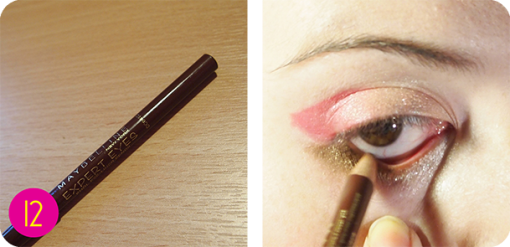
With a medium brown pencil, define your eyes by drawing a line following your eyeshape. From the middle to the outer corner, try to make it thicker. Then use a brush to smudge it.

Use the same eyepencil as before, and apply it on the first half of your water line. Apply a little bit of color on your lower lash line too.

For your ref, i was using the sephora flashy liner waterproof pencil in the shade 16- Flashy ultra brown. (could they make it even longer?)

To keep the makeup warm, apply a brown mascara on upper and lower lashes. But if you have black eyelash, it would be better for you to use a black mascara. I used the One by One maybelline mascara (wich i love so much).

Step 12&13: The lips:

Apply a dark orangy color all over your lips. I used a lipstick wich is discontinued for so long now, the Yves Rocher Rouge Lisse Nature in the shade 11- Orange Terre.

To finish the makeup look, highlight your lips by using a little bit of gloss on the center of your lips. I used the Kiss Proof Ultra Glossy Gloss from l‘Oréal. It’s just a classic shimmery transparent gloss, really great for highlights.

Now, you’re done, and prepared for the upcoming fall season!!!!

Hope you’ll like it!

Like a Baby- G…

Yeah, i need to tell you something… I like to listening K-pop, and i love Girls’ Generation. Yeah, that’s right.

So when i saw the gorgeous photoshoot they made for the Casio Baby-G campaign, i was like, OMG, i love their Makeup/ Nail / Hair. So i decided to do a tutorial of the makeup of Seohyun, the pretty maknae (youngest) of the group, and i love this makeup. It’s so great for a party or a night out!

Obviously, i don’t look like her, like nothing, but it still a beautiful makeup!

Let’s get it started!

Step 1: Foundation

Apply your favorite foundation all over your face, and blend it with a brush or your finger. I’m using BRTC Jasmin Water BB cream with a brush because it’s a very liquid BB cream, and it’s really necessary to use a brush to blend it correctly.

Step 2: Concealer

Use your favorite concealer (i’m using l’Oreal magic touch ) and apply it on your dark circleS and other imperfectionS. Then blend it with your finger/brush.

Step 3: Blush

On the picture, we can notice that Seohyun is wearing a light pink blush, but i don’t have light pink blush, because i don’t really like blushes (i have so much redness on cheek naturally), so i’m using my Sasatinnie creamy satin blush in Coral Pink. I apply it on my cheeks with my fingers and then blend it with my brush (again, and it’s always the same).

Step 4: Powder

Then set it with your favorite powder: i’m still using (since th beginning of my blog) Accord Parfait powder from L’oréal in the shade Rose Ivoiry.

Step 5: Eye Primer

As usual, use a primer all over your eyelid an under too. It will help to enhance the colors of your eyeshadow and make it stay longer.

Step 6 to 12: Eye Makeup

I started by applying the Make Up For Ever Aqua Cream in thE shade n°5 all over my eyelid. It’s a goldy peachy pink which suits really well for this make up. But you can use a pale pink eyeshadow of your choice instead.

With a hot pink eyeshadow and a angle brush, start of by drawing the liner line (as on my eyeliner tutorial). Then design your crease with it and fill your outer corner with the color. Since you reached the middle of your eye, blend it.For your ref, I used the Harmony Nacré eyeshadow Trio of Agnes.b.

Use a dark gold and apply it on the first part of your lower lash line. I’m using the Frontcover cream eyeshadow in the shade “Gold” with my go-to angle brush from Muji.

On your inner corner, use a light gold color, here i’m using Frontcover cream eyeshadow in cream (They have so much imagination for the color names). Then tab a dot of the same color on the middle of your eyelid. It will add more reflect on your makeup.

Then i apply on the outer corner of my water lash line a bronzy gold from a drugstore palette i have, to make the make up more vibrant. But that’s completely optionnal.

With the chocolate brown of your choice (i’m using one from a sephora palette, no ref sorry). Define your outer corner as Seohyun did. (i mean, as the makeup artist of Seohyun did)

With a brown pencil, apply it all over your water lash line.

Step 13: Black Liner

Use a liquid black liner, and follow the pink eye shadow until the middle of your eye in a thin line. Then, as Seohyun wear false bottom lashes, but i won’t, i’m making some dots on my lower lashes to create the illusion of dense lashes! ^^

Step 14: Mascara

To finish the eye makeup, pic your favorite black mascara and aplly it on your upper and lower eyelashes. I’m using Cil Architect from l’Oreal.

Last Step: Lips

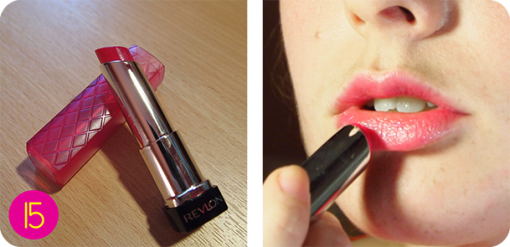
To finish the makeup, apply a bright pink on your lips! I used the Revlon LipButter in the shade lollipop.

And you’re done!!!

I just had so much fun doing this tutorial, hope you enjoyed it!

As i said before, i just love this photoshoot, and i’m quite sure that i will be back with another tutorial from SNSD beauty’s, so are you interested?
Let me know on comments!

Black line & Red lips

So classic, so chic with a black line and red lips (yeah i know my red lips is more close to a strawberry but it’s because it suits me better than a cold red)…

So simple but it always scare lot of you girls, (even me when i starded) and that’s why i decided to give you my tricks to succeed it! 😉

Let’s get the line ladies!

Step 1:

Choose your fondation and aplly it all over your face. I’m using BRTC BB cream jasmin water, because it’s light for summer, has SPF and a good hydratation.

Step 2:

Then add little of blush, i’m using sasatinnie creamy satin blush in Coral Pink. As it’s a cream blush, i use my fingers to apply it.

Step 3:

Set it with your favorite powder: i use Accord Parfait powder from L’oréal in the shade Rose Ivoiry.
Step 4:

Before applying anything on your eyelids, i’m gonna prime my eyes with Urban Decay Primer Potion. Apply it all over your eyelids and under your eye too.

Step 5:

Starting the hard part: i think gel liner are easyer to apply than liquid liner so get a gel liner and angle brush (eyebrow angle brush from MUJI and gel liner fidelity from Agnes.B)

Use your waterline as a guide to find the perfect direction and tap your brush. (as it’s a angle brush, you don’t need to draw the line, just crush the brush). Longer your stroke will be, thicher will be your liner.

Step 6:

Use your pupil as a reference for the middle of your eyes and mark the point with the brush. Next draw a straight line from the outer line to the middle point. Now, just fill in the blank part.

Step 7:

Then, with your eyes open, tap your brush from the innercorner to the middle. Doing this with your eyes open will help you to be very close to your lashes. Next apply liner on your lower AND upper waterline to intensify the look. If you want to have more drama, apply liner on all your waterline or for a lighter make up, only on the first half.

Step 8:

To mach the black line, choose a black mascara and use it on your upper AND lower lashes.

Step 9:

Choose your favorite red lipstick, tap it slithly on your lips and remove the excess with a paper. Remove this step to intensify the color and help your lipstick to stay longer.

And you’re done!

Hope you’ll find my explanation easy and usefull.

Lemon Girl

I’m nervous… My first make up tutorial! Hope you’ll like it!

I choose to begin by this easy and colorful make up, but it still wearable. I have no problem on use it every day 😉

But i think, it depend on your skin tone: my mom has a darker skin tone than me, and the yellow eyeshadow is really discrete… So, follow my tuto and try it to know !

Firstly, i use the Garnier BB cream as a foundation (of course,i have the light one). I like it, it perfectly match my skin, has a good coverage of my redness and is quite MOISTURIZING (again). I just apply it like a cream all over my face. Of course, you can use your usual fondation… No need to by this one in particular to do this make up! ^^

Then, i use the L’oréal Concealer “Accord Parfait” for my dark circles and some small imperfection… This product has a good coverage and it’s easy to blend but it doesn’t stay longer…

Before applying any kind of eyeshadow, you had to use a eyeshadow primer. Mine is the famous Urban Decay Primer Potion, but you can use whatever you prefer… (But i have to say this one is really great) Apply it all over your eyelids and under your eye too.

Then, you can use a round flat brush (mine comes from Muji) and use the brighter yellow you have all over your eyelid.

With a fluffy round brush, blend it… (My brush comes from Yves Rocher)

Choose you brighter blue eyeshadow (almost turquoise) and a angle brush (muji again for me) and draw a line which follow you eye shape to your eyebrow end. No need to do all the under line, just stop at the center of your eye.

As the make up has lots of bright color, it’s better to choose a mascara which match your natural eyelashes. That’s why i use a brown mascara (drugstore super cheap brand for me), but if you have black hair, use a black one. Use it on your upper AND lower eyelashes.

Use a liptinted gloss with a natural shade, or like me, use a red lipstick but just tap it on your lip to add a little bit of color and use a transparent gloss on it for more shine.. (the product i used are discontinued so…)

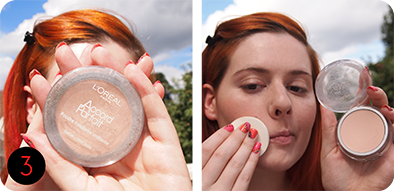
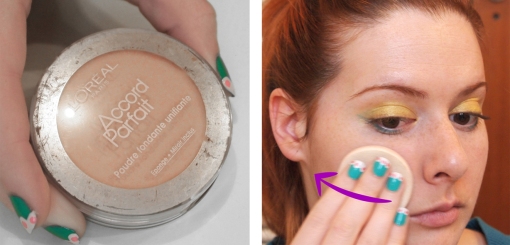
Set it with your favorite powder: i use Accord Parfait powder from L’oréal, and i use the sponge and not a brush because this powder is so light, even with a sponge your not cakey…

And you’re done!!!

Hope you like it, and don’t hesitate to show me your version of this make up!!!

See you soon,